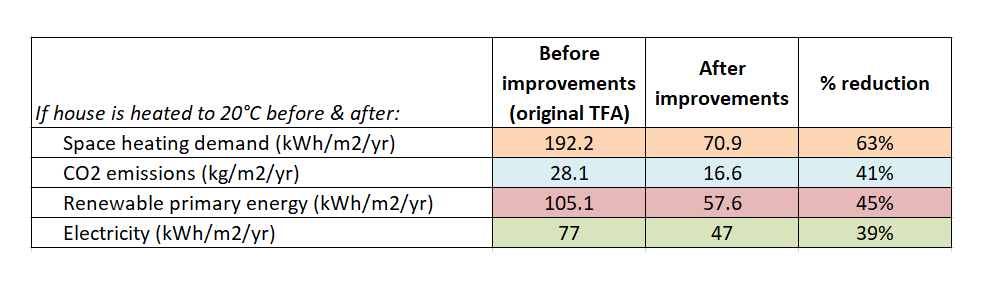
When all phases will be completed in future, we envisage a 63% reduction in space heating demand (with a final demand of around 71 kWh/m2.yr).
Walls
There were 10 different existing wall types to enter into PHPP – these were either of different thickness (360 – 730mm) or construction (most were solid sandstone, sometimes with an additional inner brick layer, but there was also one cavity wall), or else they were the same as somewhere else but had had insulation added internally (50mm of XPS or EPS).
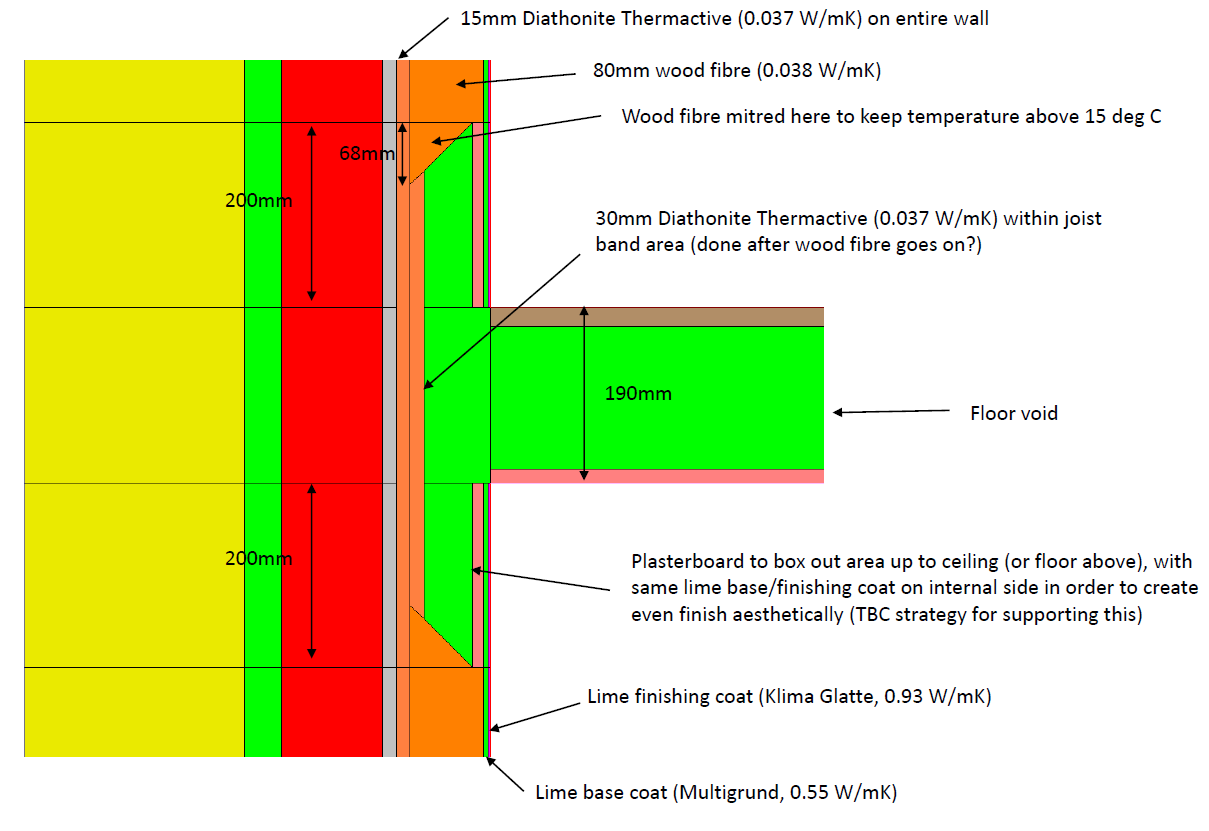
After a WUFI moisture analysis, we decided to keep the same solution for all solid walls: 15mm of diathonite followed by 80mm wood fibre, with 10mm of lime plaster as the airtightness layer. U-values for most walls ranged from 0.31 – 0.34 W/m2K.
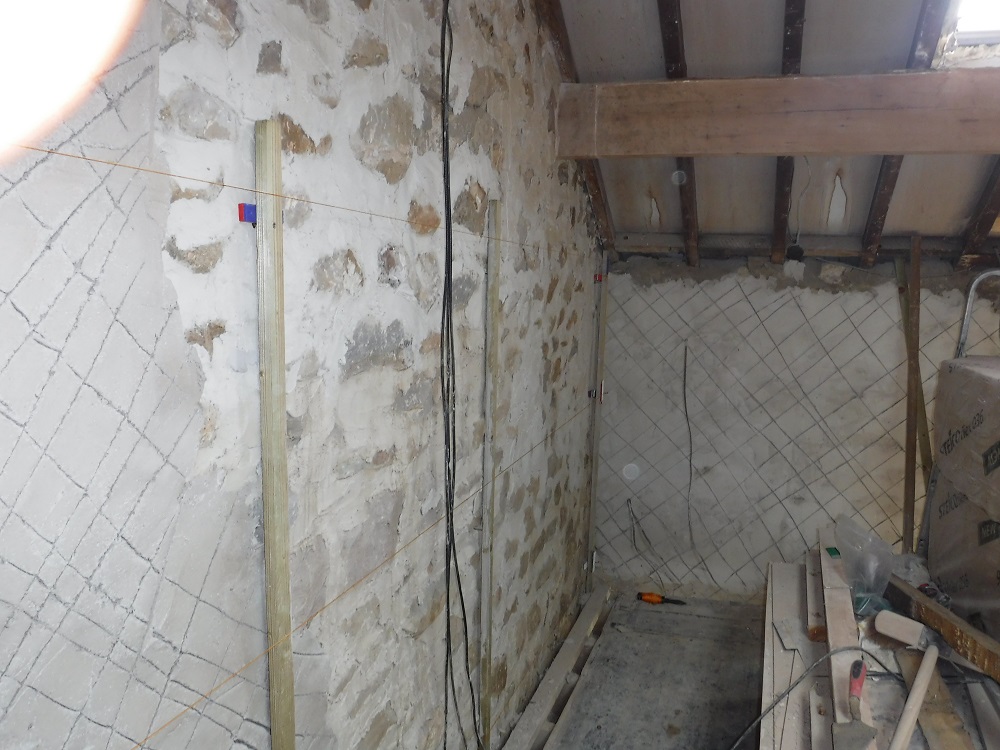
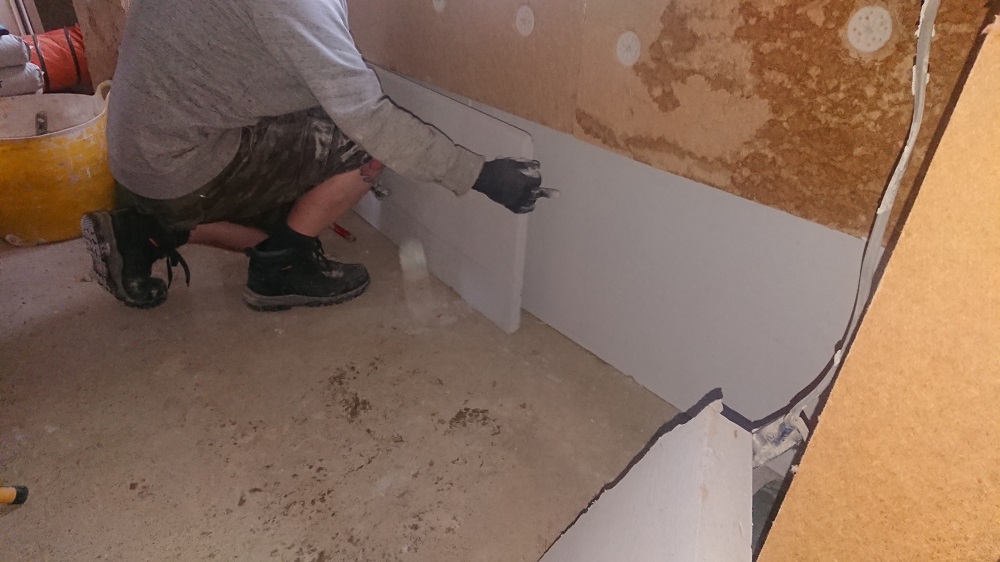
Once the existing walls were taken back to stone, it was clear that they were fairly uneven and would need dubbing out before diathonite could be applied. This dubbing out was done with lime – however this took a long time to dry out properly, and the contractor said that next time they would use hempcrete which would have dried quicker.
Having resolved a couple of moisture sources that were apparent during the drying out time for the diathonite, we then installed 80mm of wood fibre over that. But for the bottom metre next to the floor, we decided to install Calsitherm instead of wood fibre, just to be sure in case of any recurrence of moisture.
Roof
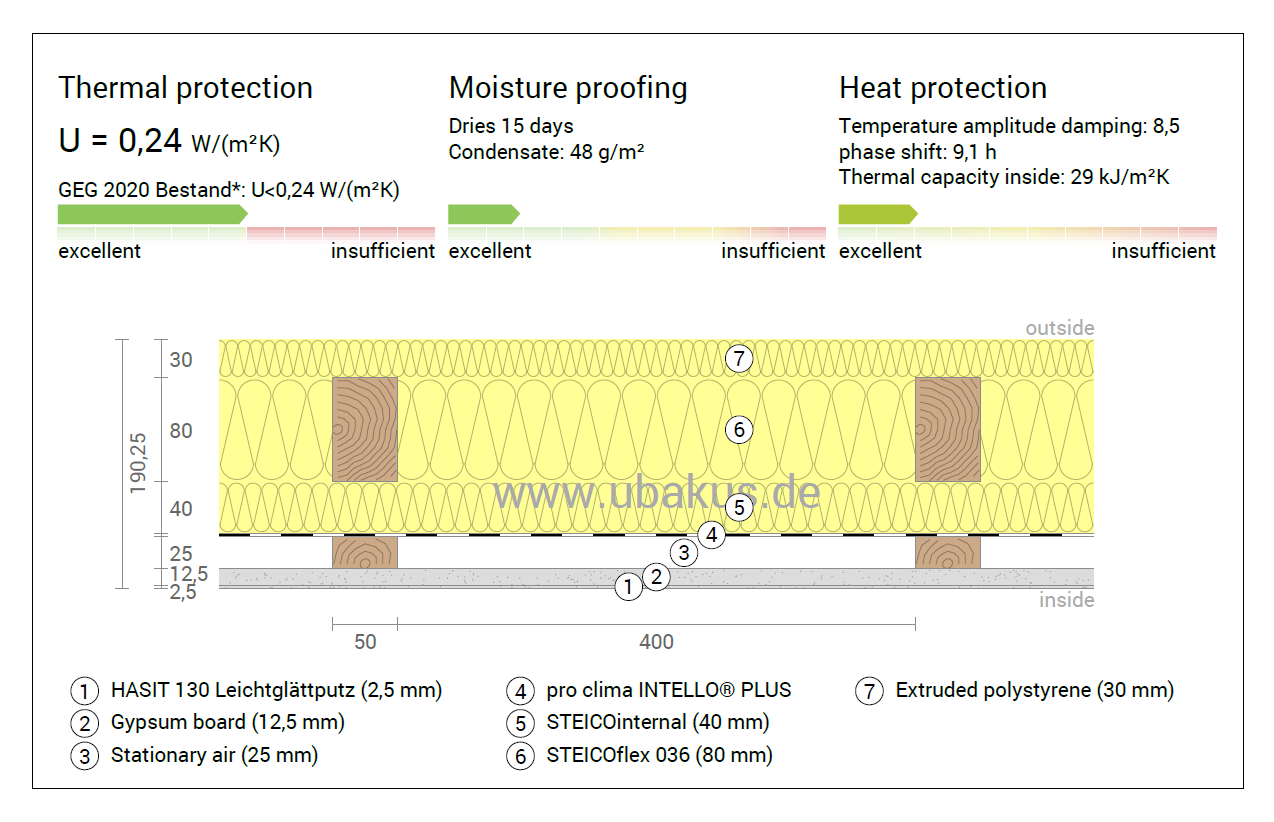
The house had three main roof types – over the ground floor utility room there was a cold loft with minimal insulation (above which there was a pitched roof), and over the second floor there was either 30mm of XPS that had been installed over rafters, or 50mm of PIR that had been friction-fitted between rafters. During phase 1, the utility room roof was insulated (cold loft removed, flexible wood fibre within existing rafters and also below within rafter extensions, followed by T&G wood fibre boards, u-value 0.12 W/m2K), as well as the roof with existing XPS (where we were more constrained internally – here we put 80mm of flexible wood fibre between rafters, and 40mm T&G wood fibre under rafters, followed by an airtightness membrane and service void, u-value 0.25 W/m2K).
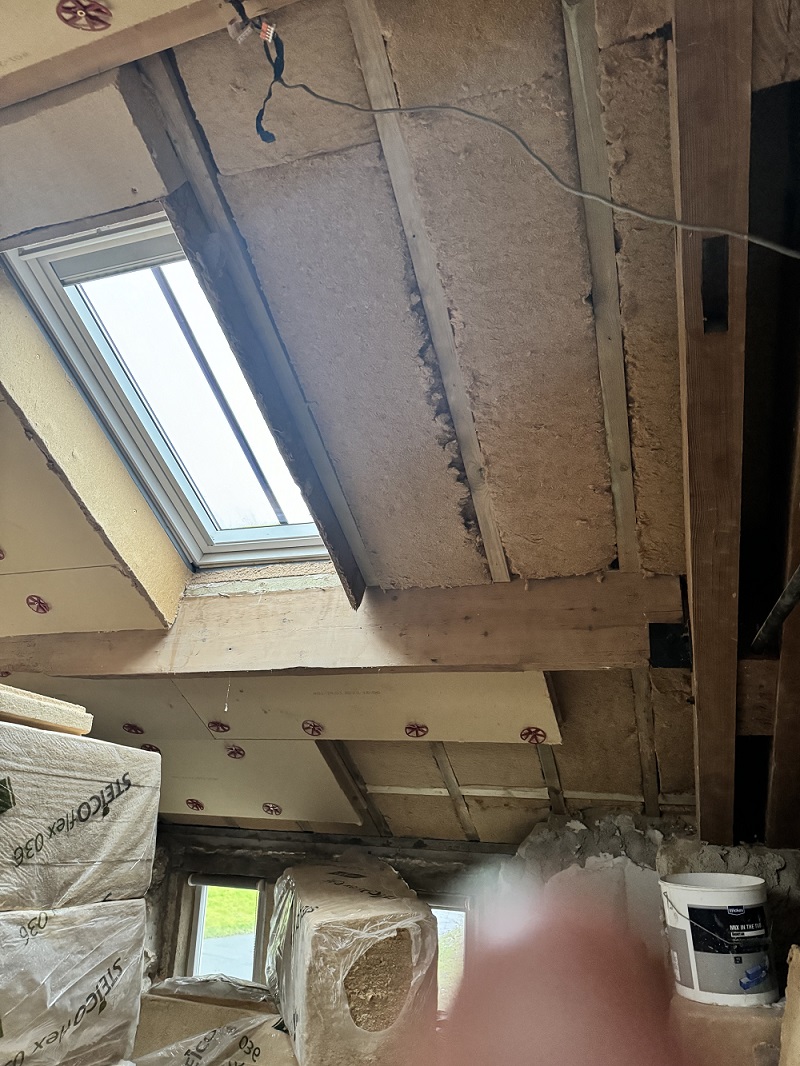
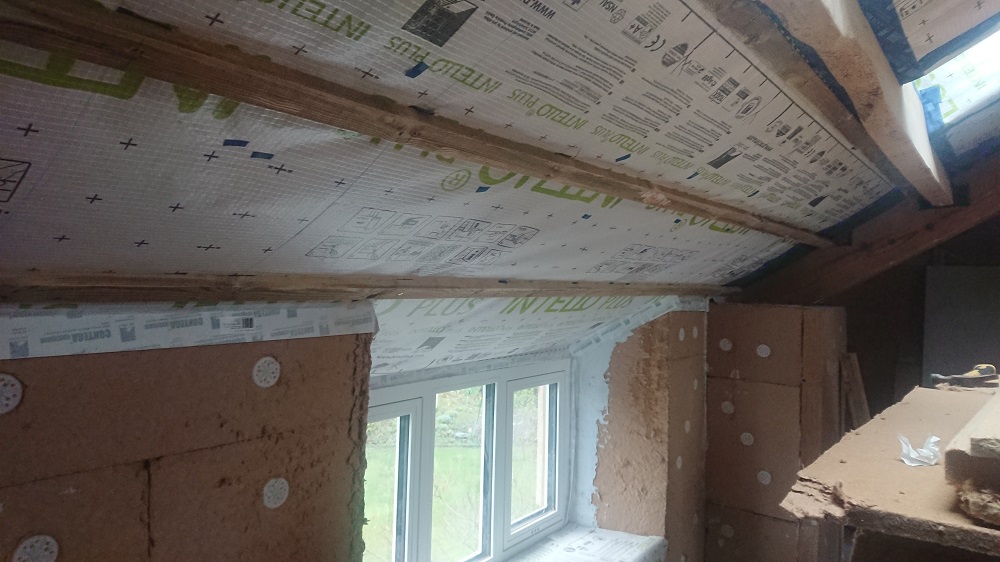
We did cross-check the condensation risk for the roof with existing XPS, which appeared OK – we had also wanted to check that the protection from summer heat given by the wood fibre was still sufficient given the thickness we were able to install (see below). The result here was that we still had a phase shift of 9 hours (for anyone interested, the document Summer Heat Protection gives is an excellent explanation as to why wood fibre should be used for roofs).
Floors
The existing floor in the living room (below master bedroom) had wooden floorboards that were installed over a 15mm frame holding some sort of granular material, which itself sat on a solid slab. The plan was to take this up, dig out the floor as far as the footings allowed us, and then re-insulate with compacted glass aggregate followed by a lime screed – once excavation took place, it was clear that we would only be able to put in 100mm of glass aggregate followed by a 75mm lime screed that housed the underfloor heating pipes, which gave us a u-value of 0.55 W/m2K, but this was still opted for due to its vapour-open nature.
The floor in the utility room was a solid slab without insulation – here we did something similar like the living room, which involved digging the floor up.
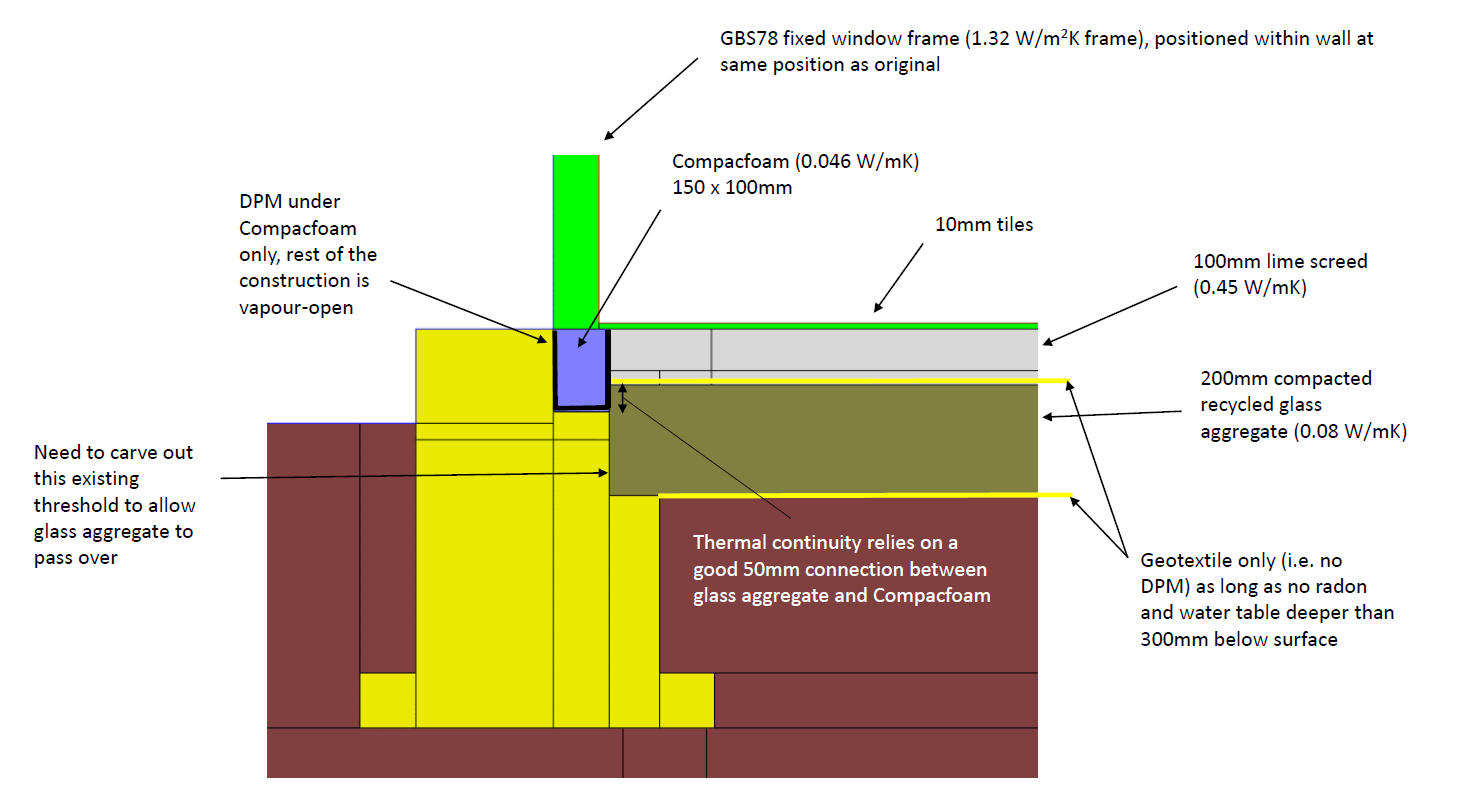
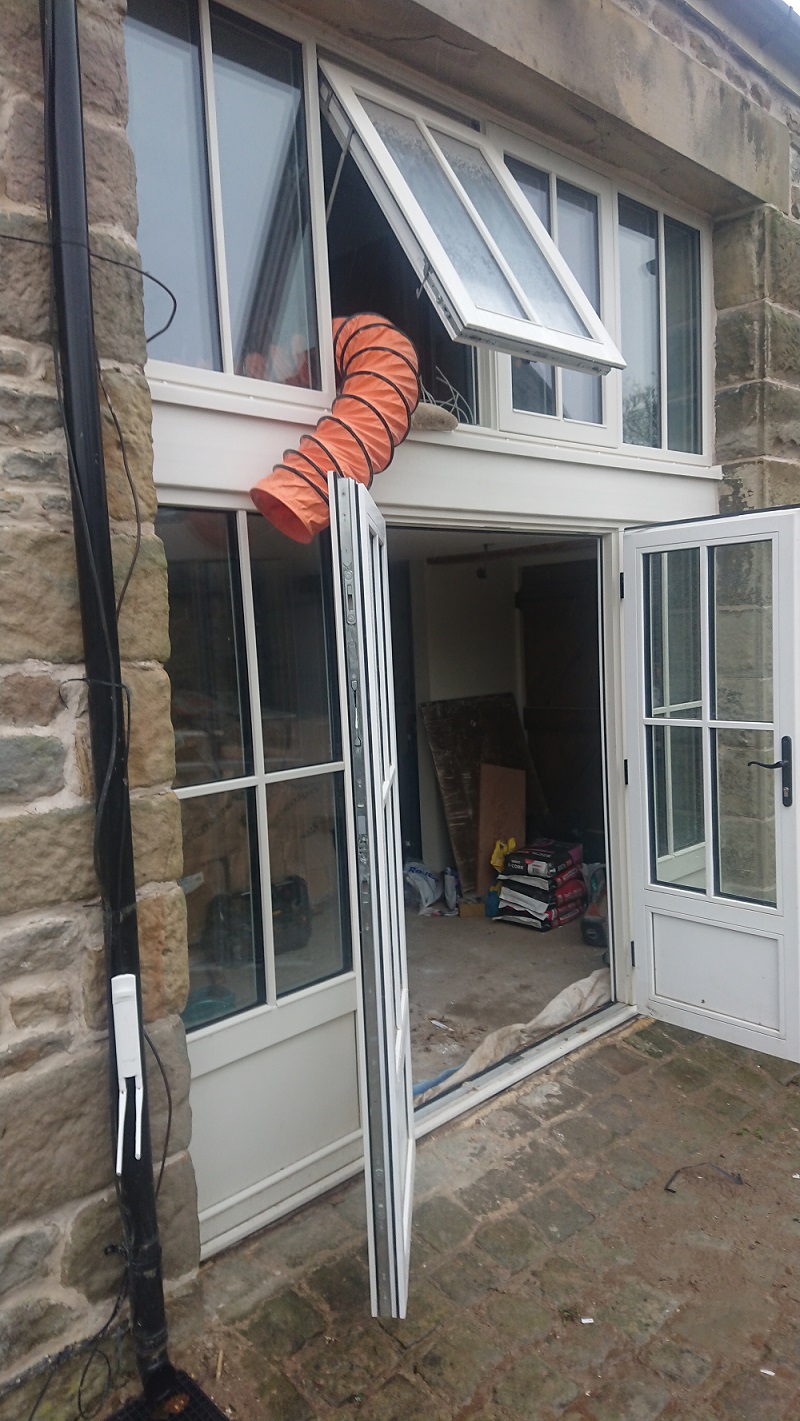
For both floors we had to ensure continuity of insulation along the floor perimeter (done via an upstand connecting with the wall insulation), as well as continuity over the threshold to the door and window frames. This meant ensuring that there was coordination between those doing the floor and those installing the windows and doors.
New windows & doors were installed throughout (for all walls), but the Velux windows were good enough quality so were left in place. There had been a challenge with sub-contracted window installers, as they had initially approached the task in typical rough fashion, which the main contractor who was on site at the time then had to help supervise.
Since internal wall insulation was being proposed and the house was in a reasonably exposed location, we felt it would be sensible to get some WUFI hygrothermal modelling done to assess moisture risk and how much insulation we could safely apply and to decide on the airtightness strategy (this is so that solid walls can still dry out as fast as they get wet, which might not be the case if you add too much insulation internally or have an airtightness layer that is a bit less vapour-open). Some of the existing walls already had 50mm of either XPS or EPS insulation internally, sometimes together with an impermeable membrane – coring out some of the existing XPS insulation in the utility room from a west-facing wall revealed humid conditions behind.
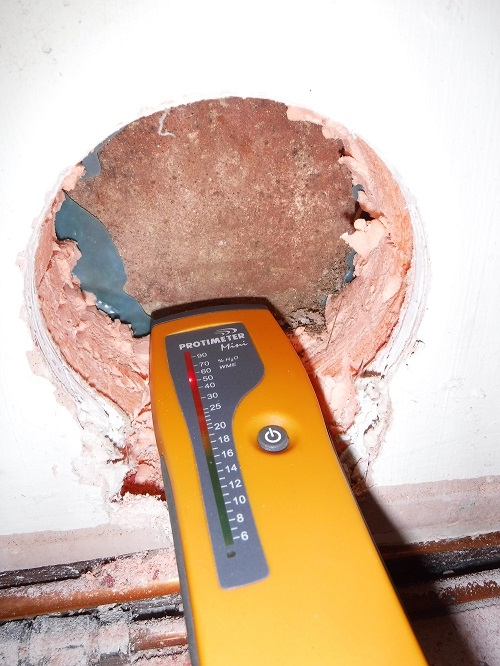
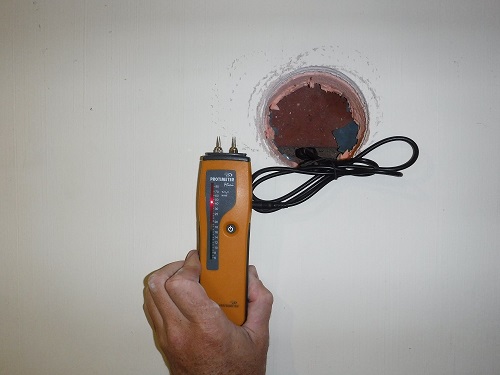
In order to do the WUFI moisture risk analysis properly, core samples were taken from different walls.
The WUFI analysis was then run on 6 walls in 4 orientations, and concluded that 15mm of diathonite followed by 80mm of wood fibre with 10mm of lime plaster internally would be safe, as long as there was an MVHR system installed and that the wall exterior was maintained in a good condition. The graph below shows the relative humidity at the critical interface between the masonry and diathonite for one of the walls.
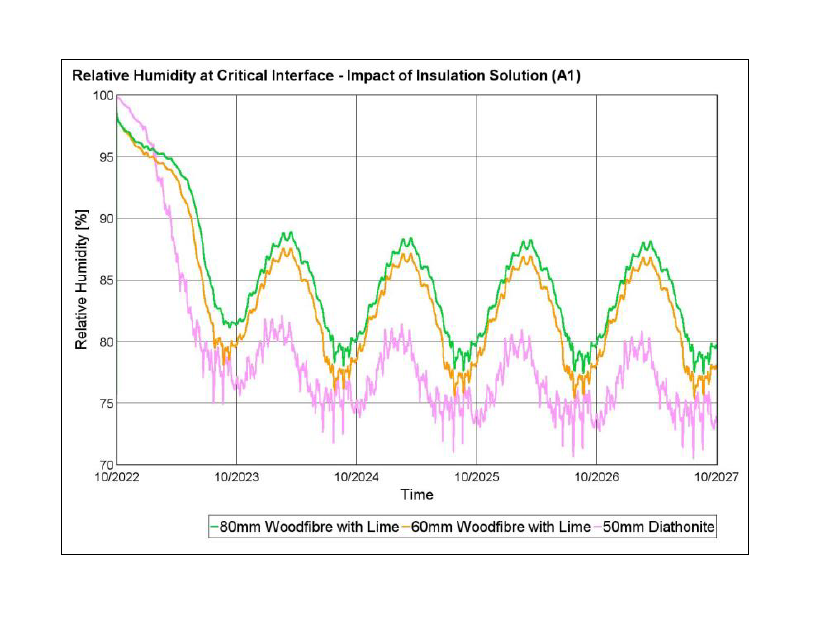
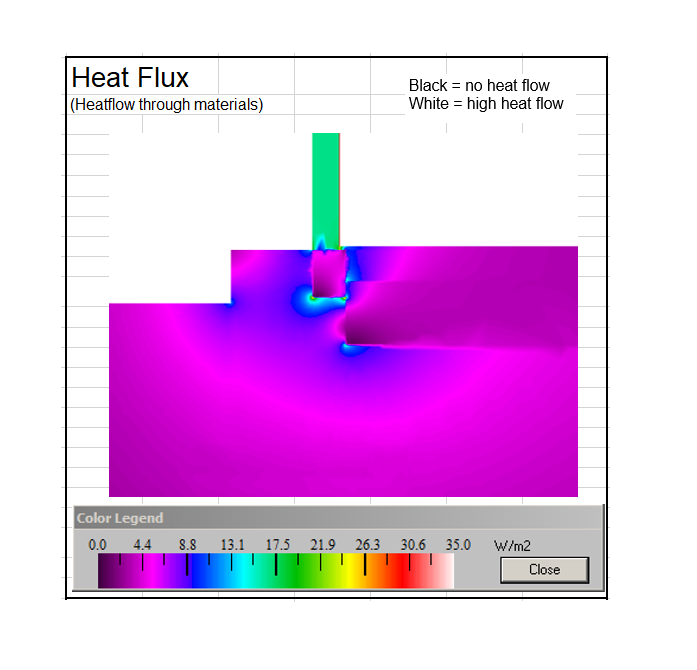
However, it was not only the overall moisture content in walls that had to be checked, since the most vulnerable part within such a wall will be where there is timber. The analysis therefore also checked relative humidity levels at joist ends where these entered a wall (maximum allowed was 87% relative humidity). In order to remain below this threshold, the wall around any joist ends would have to only be insulated with 30mm of diathonite. The question then was what distance above and below the joists would have to be insulated like this before reverting back to the main wood fibre insulation – we felt that keeping 200mm both above and below would be sufficient, but this was not exactly based on a moisture model but was more of a best guess. Given such a scenario, we ran a thermal bridge model to check surface temperatures within this joist zone, since we also needed there to be no condensation risk (i.e. surface below 15 degrees Celsius) – we found that this was all fine as long as the edges of the wood fibre boards were mitred.
Once the lounge floor had been dug up, it was clear that there was water ingress at a couple of points along the base of the wall. This was resolved by digging a gravel-filled drain on the outside of the wall to take water away from the wall, as well as lowering the ground level slightly. The strategy for the floor was a vapour-open one, where any residual moisture would be able to escape through the glass aggregate insulation and lime screed to be extracted by the ventilation system (rather than making it impermeable which might push moisture towards the walls instead).
When insulating the walls starting with diathonite (which was applied over the dubbed-out walls), the walls were allowed to dry out fully before any wood fibre was applied. During this drying process, what we found was that there were two patches of moisture that recurred on the walls. The source of one of these was traced to gaps in mortar between the external stone blocks at the level of the flowerbed. The other always seemed to recur after a rain event, and what we assumed was that driven rain was soaking into what was a more porous gable wall and percolating down through the rubble to the base, where it appeared as temporary rising damp. These were resolved by some repointing and checking for cracks in the outer wall. Once these were resolved, we still decided to install Calsitherm on the bottom metre of the wall (instead of wood fibre), just to be sure.
We modelled 10 thermal bridge junctions for phase 1 which included window to wall, door thresholds, floor to wall, wall to roof, various partition walls to ground and to walls, and also the joist zone where we needed to reduce insulation thickness to protect the joist ends.
Below shows the living room door threshold as an example (it achieved -0.15 W/mK based on external measurements).